MuseSearch™ Integration in SharePoint
Besides the dedicated SharePoint MuseSearch™ WebPart, available since Muse 2.3.0.0, starting with Muse version 2.7.0.0, MuseSearch™ Application 3.9 version, in this post we describe two other simple ways to integrate the MuseSearch™ Application into a SharePoint site.
1. Insert a MuseSearch™ Application into a SharePoint 2013 Site Using the “Page Viewer Web Part”
Based on the tutorial http://community.bamboosolutions.com/blogs/sharepoint-2013/archive/2013/07/30/how-to-insert-a-web-page-onto-a-site-using-the-page-viewer-web-part-for-sharepoint-2013.aspx the actions to include the MuseSearch™ Application are:
1. Edit an existing SharePoint site page or Add a new page and Edit it;
2. On the “Edit Page”, select the “Insert Web Part” tab. From there, select “Media and Content” from “Categories”, and then “Page Viewer” from the “Parts” list;
3. Go to “Edit Web Part” to open the “Tool Pane” and input the Muse address (e.g. http://demo.museglobal.ro/muse/) you wish to display on your site into the “textbox” on the “Page Viewer”;
4. Click to “Apply” and “OK” to finish inserting the MuseSearch™ Application login page.
An example of a SharePoint page with MuseSearch™ Application interface included is depicted below.

2. Insert a MuseSearch™ Widget into a SharePoint 2013 Site Using the “Script Editor Web Part”
Based on the tutorial http://blog.cloudshare.com/2012/10/29/how-to-insert-custom-javascript-code-in-sharepoint-2013-pages-part-i the actions to include the MuseSearch™ Widget are:
1. Edit an existing SharePoint site page or Add a new page end Edit it;
2. On the “Edit Page”, select the “Insert Web Part” tab. From there, select “Media and Content” from “Categories”, and then “Script Editor Web Part”;
3. Click on the “EDIT SNIPPET” link and insert the HTML and JavaScript code for MuseSearch™ Widget just as we have in the https://www.edulib.com/blog/musesearch-widget-demo-2-using-pagination-for-the-result-set-list/ page:
<html>

<head>

<link rel="stylesheet" href="http://demo.museglobal.ro/muse/logon/MuseSearch/skins/redmond/jquery-ui.css"/>

<script src="http://demo.museglobal.ro/muse/logon/MuseSearch/javascripts/jquery.js"></script>

<script src="http://demo.museglobal.ro/muse/logon/MuseSearch/javascripts/jquery-ui.js"></script>

<link rel="stylesheet" href="http://demo.museglobal.ro/muse/MSWidget/MSWidget.css"/>

<script src="http://demo.museglobal.ro/muse/MSWidget/MSWidget.js"></script>

</head>

<body>

<div id="EmbededMSWidget" style="width: 600px; height: 400px;"></div>

<script>

mSWidget.init({

URL: "http://demo.museglobal.ro/muse/servlet/MusePeer", // Server URL

USER_ID: "MSWidget", // User ID

USER_PWD: "lzOoUwTu7E/UvHCw9KpOsmoEbl4=", // User Password

USER_PWD_ENCRIPTION: "SHA1", // User Pasword Encription. Values: "" | "SHA1"

WIDGET_PLACEDOLDER: "#EmbededMSWidget", // The Placeholder where the Widget will be displayed. Values: body | #ID (The ID of a HTML element such as DIV, SPAN, TD, P)

RESULTS_PER_PAGE: 10, // Results per page

RESULTS_PER_SOURCE: 10, // Results per source

USE_PAGINATION: "true" // Use Pagination. Values: "false" | "true". The "false" value means that an infinite scroll is used for the result set list. The "true" value means that the result set list is displayed in multiple pages.

})

</script>

</body>

</html>
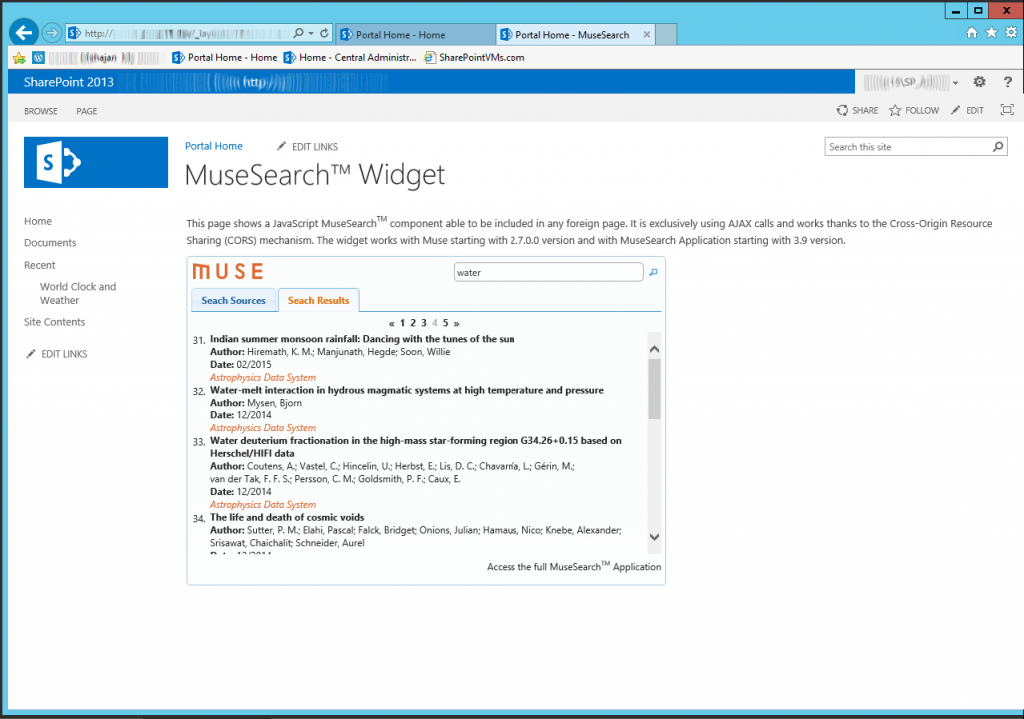
An example of a SharePoint page with MuseSearch™ Widget included is depicted below.